USER_MANUAL
Complete guide to installing and using AudioBash on Windows, macOS, and Linux.
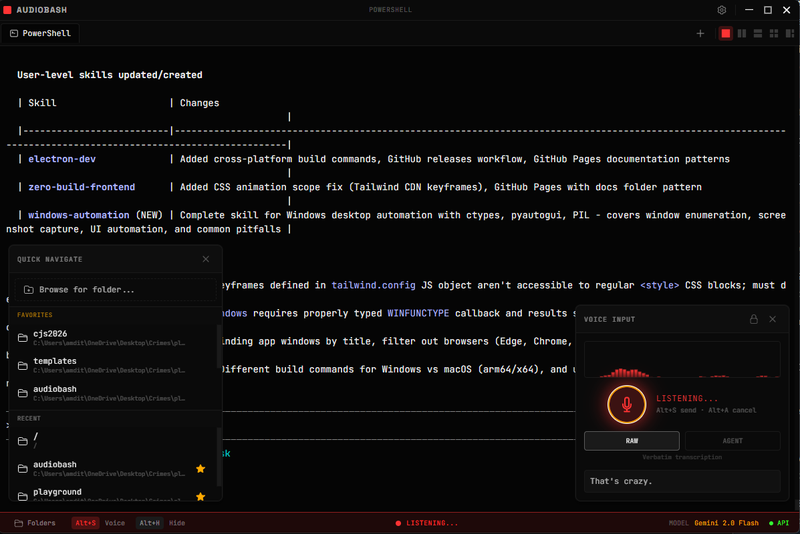
01 INTRODUCTION
AudioBash is a voice-controlled terminal built to work with Claude Code. Instead of typing commands, you can speak them directly into your terminal. The application transcribes your voice input using AI-powered speech recognition and executes commands in a real terminal environment.
Key features
- Push-to-talk voice input - Hold a hotkey to record, release to transcribe and execute
- Multi-provider transcription - Gemini, ElevenLabs, or local Whisper/Parakeet
- Real terminal environment - Full PTY (pseudo-terminal) with shell access
- Agent mode - AI-powered command generation for complex tasks
- Cross-platform - Works on Windows 10/11, macOS (Intel & Apple Silicon), and Linux
02 INSTALLATION
Windows installation
System requirements
- Windows 10 or Windows 11
- 4GB RAM minimum (8GB recommended)
- 200MB disk space
- Microphone for voice input
Installation steps
-
1
Download the installer
Visit audiobash.app or the releases page and download the latest
.exeinstaller -
2
Run the installer
Double-click the .exe file. If Windows SmartScreen appears, click "More info" then "Run anyway"
-
3
Launch AudioBash
Find AudioBash in your Start Menu or use the desktop shortcut
-
4
Grant microphone access
Windows will prompt for permission on first use - click "Yes" to allow
macOS installation
System requirements
- macOS 12 (Monterey) or later
- Apple Silicon (M1/M2/M3/M4) or Intel processor
- 4GB RAM minimum (8GB recommended)
- 200MB disk space
- Microphone for voice input
Installation steps
-
1
Download the DMG
Visit audiobash.app or the releases page and download:
- Apple Silicon (M1/M2/M3/M4): the
arm64.dmg - Intel Macs: the
.dmg(non-arm64)
- Apple Silicon (M1/M2/M3/M4): the
-
2
Install the app
Double-click the DMG, drag AudioBash.app to Applications, then eject the DMG
-
3
First launch (important!)
AudioBash isn't code-signed yet. The signing infrastructure is in the repo and signed builds are planned; until then, you must bypass Gatekeeper on first launch:
Method 1 - Right-click (recommended)
Open Finder → Applications → Right-click AudioBash.app → Select "Open" → Click "Open" in the dialog
Method 2 - Terminal command
xattr -cr /Applications/AudioBash.app -
4
Grant permissions
macOS will request:
- Microphone access: System Settings → Privacy & Security → Microphone
- Accessibility access: System Settings → Privacy & Security → Accessibility (required for global hotkeys)
Linux installation
System requirements
- A 64-bit Linux distribution (the AppImage runs on most; the .deb is for Debian/Ubuntu)
- A glibc-based distro (most mainstream distributions)
- 4GB RAM minimum (8GB recommended)
- Microphone for voice input
Download
Grab a prebuilt build from the releases page: the portable AppImage or a Debian/Ubuntu .deb.
Make the AppImage executable with chmod +x AudioBash-*.AppImage and run it, or install the .deb with sudo dpkg -i AudioBash-*.deb. Grant microphone access when prompted.
Or build from source
Prefer to build it yourself? You'll need Node.js 20 or newer and the native build tools (build-essential and python3) to compile node-pty.
-
1
Clone the repository
git clone https://github.com/jamditis/audiobash.git cd audiobash -
2
Install dependencies
This compiles node-pty for your architecture.
npm install -
3
Build the Linux package
Produces an AppImage and a .deb in
dist/. To run without packaging, usenpm run electron:dev.npm run electron:build:linux -
4
Run it
Make the AppImage executable with
chmod +xand launch it, or install the .deb withsudo dpkg -i. Grant microphone access when prompted.
03 FIRST-TIME SETUP
Step 1: Choose your transcription provider
AudioBash supports multiple AI providers for speech-to-text:
| Provider | Best for | Get API key |
|---|---|---|
| Gemini (recommended) | Fast, accurate, free tier | aistudio.google.com |
| ElevenLabs Scribe v2 | Real-time (~150ms), VAD auto-commit | elevenlabs.io |
| Local Whisper | Offline, no API key | Built-in (downloads model on first use) |
Step 2: Enter your API key
- 1. Click the gear icon in the top-right corner
- 2. Select your transcription provider from the dropdown
- 3. Paste your API key in the text field
- 4. Click "Save"
Step 3: Test voice recording
- 1. Press
Option+S(Mac) orAlt+S(Windows) to start recording - 2. Say a simple command: "list files in current directory"
- 3. Press the hotkey again to stop
- 4. Watch the transcription appear in the terminal
04 USING AUDIOBASH
Keyboard shortcuts
| Action | Windows / Linux | macOS |
|---|---|---|
| Start/stop recording | Alt+S |
Option+S |
| Cancel recording | Alt+A |
Option+A |
| Resend last transcription | Alt+R |
Option+R |
| Toggle raw/agent mode | Alt+M |
Option+M |
| Show/hide window | Alt+H |
Option+H |
| Clear terminal | Alt+C |
Option+C |
| Increase font size | Ctrl+= |
Ctrl+= |
| Decrease font size | Ctrl+- |
Ctrl+- |
| Reset font size | Ctrl+0 |
Ctrl+0 |
| Switch to tab 1-4 | Alt+1 - Alt+4 |
Option+1 - Option+4 |
| Bookmark current directory | Alt+B |
Option+B |
| Cycle layout preset | Alt+L |
Option+L |
| Split pane horizontal | Alt+- |
Option+- |
| Split pane vertical | Alt+\ |
Option+\ |
| Close pane | Alt+W |
Option+W |
| Zoom/unzoom pane | Alt+Z |
Option+Z |
| Focus next pane | Alt+Right |
Option+Right |
| Focus previous pane | Alt+Left |
Option+Left |
| Resize pane | Alt+Shift+Arrow |
Option+Shift+Arrow |
| Toggle preview pane | Alt+P |
Option+P |
| Capture preview screenshot | Alt+Shift+P |
Option+Shift+P |
New tab and close tab have no keyboard shortcut - use the + button to add a tab and the × on a tab to close it.
Linux note: the global Alt shortcuts above register under X11 but may not fire under Wayland. If a shortcut doesn't respond on a Wayland session, switch to an X11 session or use the on-screen controls instead.
Voice recording
AudioBash uses a push-to-talk model:
- 1. Press the hotkey to start recording
- 2. Speak your command clearly
- 3. Release (or press again) to stop and transcribe
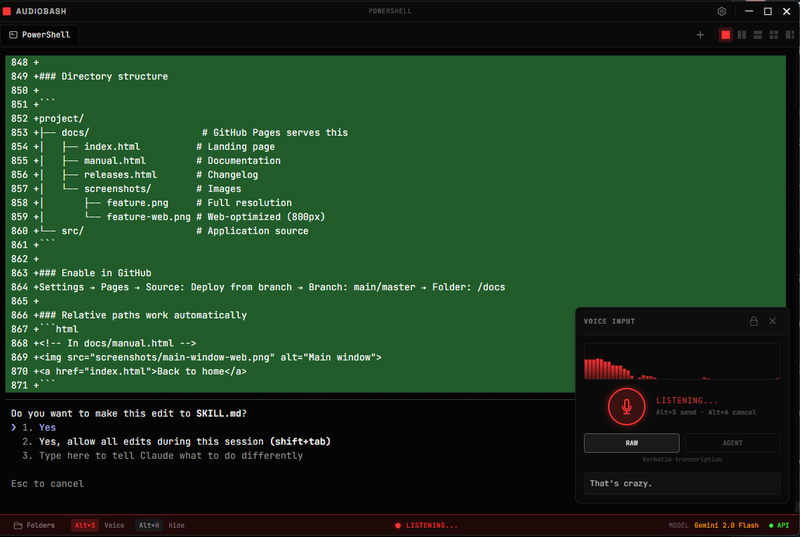
Voice input panel with waveform visualization and RAW/AGENT mode toggle
Recording states
Terminal modes
AudioBash has two modes for handling voice input:
Raw mode (default)
Transcribed text is sent directly to the terminal. What you say is exactly what gets typed.
Best for: Simple commands, when you know exactly what to type
Types:
cd projects
Agent mode
An AI interprets your intent and generates the appropriate command. Handles natural language requests.
Best for: Complex tasks, when you're unsure of exact syntax
Generates:
find . -name "*.js" -mtime -7
Toggle between modes with Alt+M (Windows) or Option+M (Mac).
Multi-tab interface
AudioBash supports multiple terminal tabs:
- New tab: Click the
+button - Switch tabs: Click a tab or press
Alt+1-Alt+4(Option+1-Option+4on Mac) - Close tab: Click the
×on the tab - Rename tab: Double-click the tab title
Each tab maintains its own working directory, command history, and shell session.
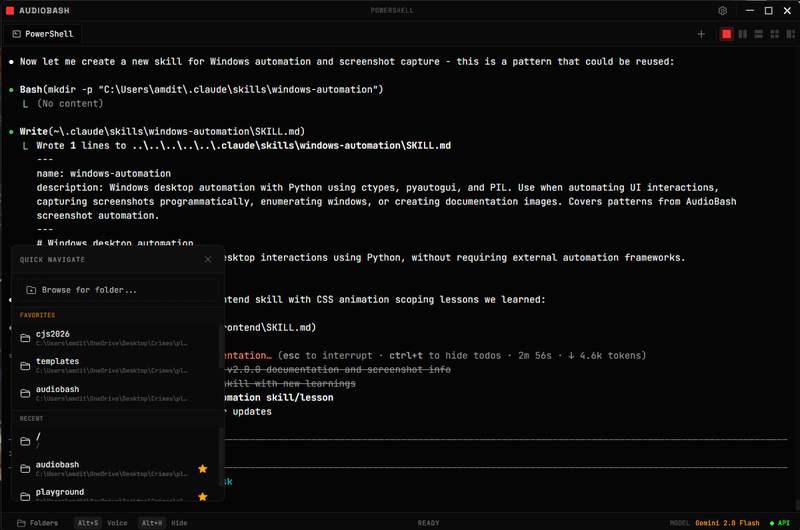
Quick navigation with favorites and recent directories
05 SETTINGS
Access settings by clicking the gear icon in the top-right corner.
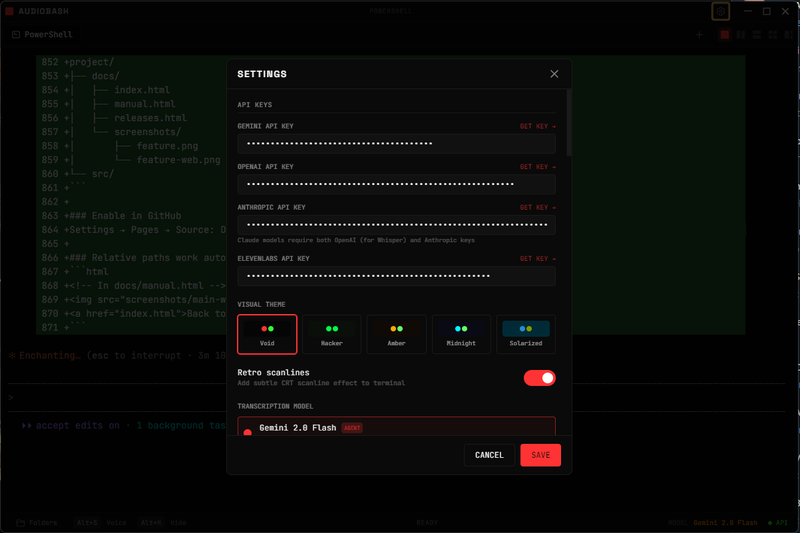
API keys and visual themes
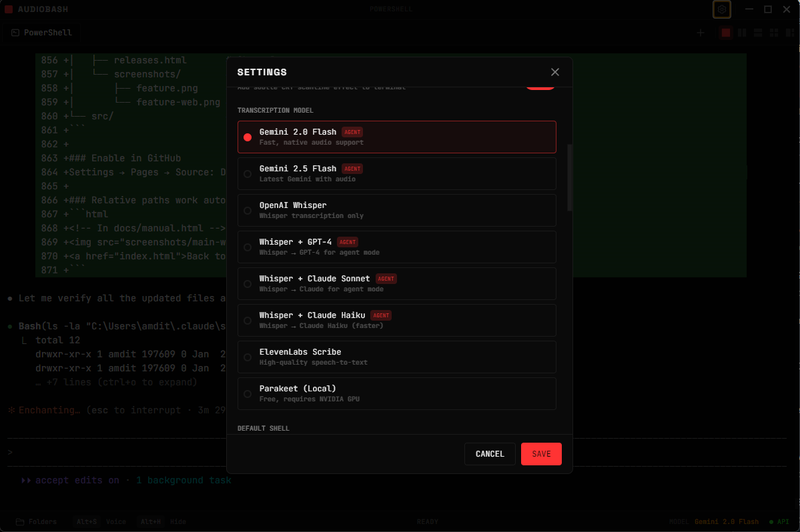
Transcription model selection
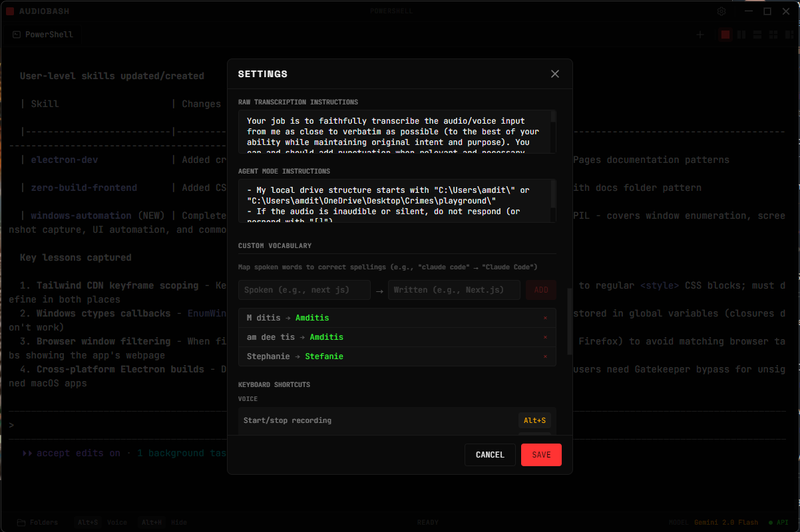
Custom instructions and vocabulary
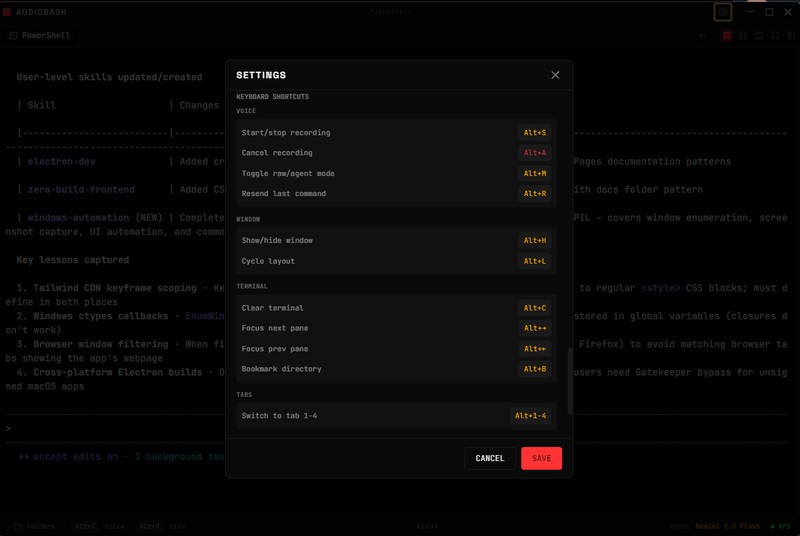
All keyboard shortcuts
API keys
| Setting | Purpose |
|---|---|
| Transcription API key | Speech-to-text (Gemini) |
| ElevenLabs API key | Real-time and batch speech-to-text (Scribe) |
Transcription providers
- Gemini 2.0 Flash - Google's fast, accurate model (recommended, free tier)
- Gemini 2.5 Flash - Latest Gemini with audio support
- ElevenLabs Scribe - High-quality batch speech-to-text
- ElevenLabs Scribe v2 - Real-time WebSocket streaming (~150ms latency)
- Parakeet (local) - Offline transcription on an NVIDIA GPU. Advanced: it sends audio to a separate Parakeet server you run yourself at
localhost:8003. Unlike Whisper, no server is bundled, so you must start one before selecting this provider. - Local Whisper - Offline transcription via whisper.cpp (small.en, 466 MB), no API key required
Click the model name in the voice overlay to cycle between providers without opening settings.
06 TROUBLESHOOTING
Windows issues
"Windows protected your PC" SmartScreen warning
Click "More info" then "Run anyway". This appears because the Windows build is not yet code-signed.
Global shortcuts not working
Check for conflicts with other apps, try running AudioBash as Administrator, or restart the app.
macOS issues
"AudioBash is damaged and can't be opened"
This is Gatekeeper blocking an unsigned app. Fix with:
xattr -cr /Applications/AudioBash.appGlobal shortcuts (Option+S) not working
Go to System Settings → Privacy & Security → Accessibility. Find AudioBash, toggle it off and on, then restart the app.
General issues
"API key is invalid" error
Double-check you copied the entire key, verify it's for the correct provider, and check that billing is set up if required.
Transcription is inaccurate
Speak more slowly and clearly, reduce background noise, try a different provider, or check your internet connection.
07 FAQ
Is AudioBash free?
Yes. AudioBash is free and open source. Cloud transcription services require API keys, which may have usage costs. Gemini offers a generous free tier, and local Whisper requires no API key at all.
Does AudioBash work offline?
Partially. Local Whisper provides offline transcription with no internet required. Cloud providers (Gemini, ElevenLabs) require internet connectivity.
Can I use AudioBash with any shell?
Yes. On Windows, it defaults to PowerShell. On macOS and Linux, it uses your default shell (your $SHELL, usually zsh on macOS and bash on Linux). You can start any shell by typing its name.
Can I use AudioBash with Claude Code CLI?
Yes - that's what it's designed for. Type claude in the terminal to start Claude Code, then use voice commands to interact with it.
Where are settings stored?
Windows: %APPDATA%\AudioBash\
macOS: ~/Library/Application Support/AudioBash/
Linux: ~/.config/AudioBash/
How do I report bugs or request features?
How is it connected to the terminal? Is it linked to external terminal windows 1, 2, 3, etc.?
No, AudioBash doesn't link to external terminal windows. It has its own embedded terminal built in. The app uses xterm.js for the terminal display and node-pty to spawn real shell processes (PowerShell on Windows, zsh/bash on macOS). When you speak, the transcribed text is sent directly to the active terminal tab within the app. Each tab runs its own independent shell session - there's no connection to Terminal.app, Windows Terminal, or any other external terminal program.